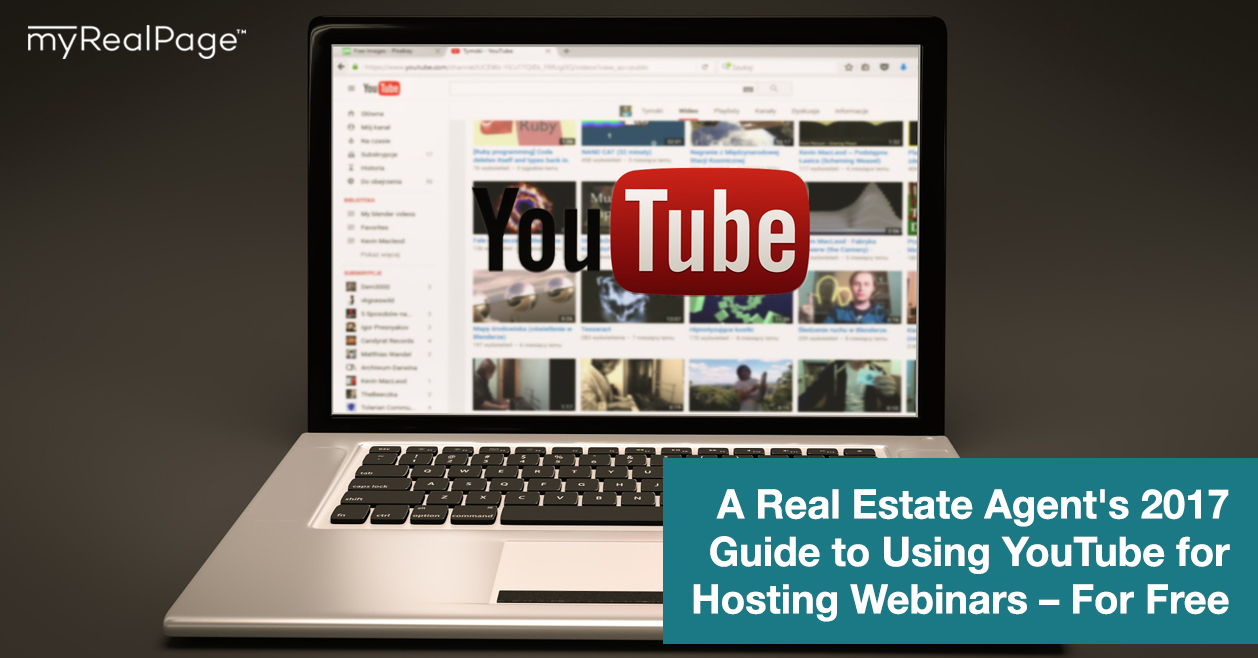
A Real Estate Agent’s 2017 Guide to Using YouTube for Hosting Webinars – For Free
You’ve heard that webinars are an effective way to grow your online presence, get more clients, and bring in more sales.
So you start looking into the hows of incorporating this tool into your own online real estate business.
You discover that the tools to run webinars vary massively. Some will cost you $500 a year, and some are free.
Today, we’re covering our most favourite path to hosting a webinar – that’s totally free.
That’s right. You don’t have to spend hundreds of dollars each month or year to reach your audience through webinars.
To get started, you simply need to have a verified YouTube channel in which live streaming is enabled.
That’s it.
Some webinar hosts worry about having the perfect landing page to host the live stream on with all the live chat fixins’, but in the spirit of keeping things simple, we’re going to host our webinar all through the tools of YouTube.
Ready? Let’s set up your free real estate webinar.
1. Head to the Dashboard of your YouTube channel.
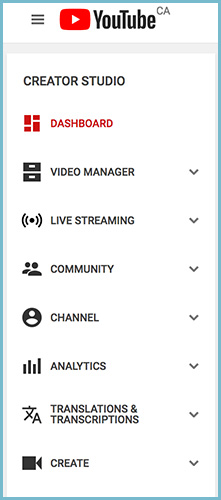
2. On the left-hand menu, choose “Live Streaming” and then “Events.”
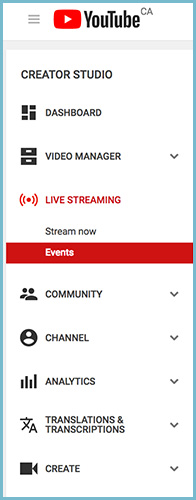
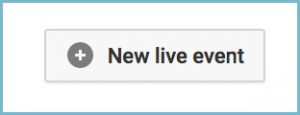
3. In the upper-right corner, click “New live event.”
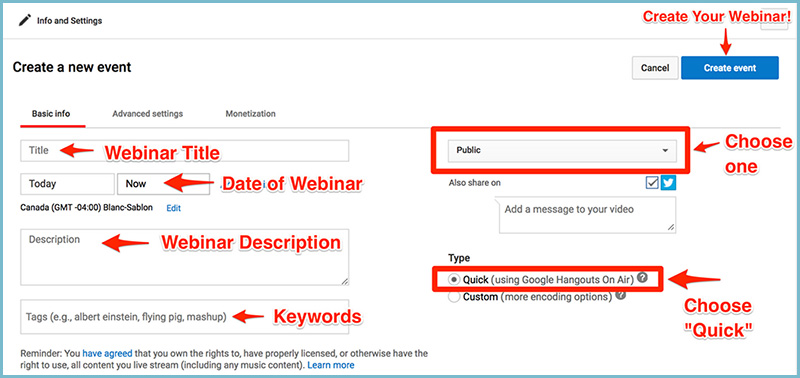
4. Then, go ahead and create your scheduled webinar by filling in the following information:
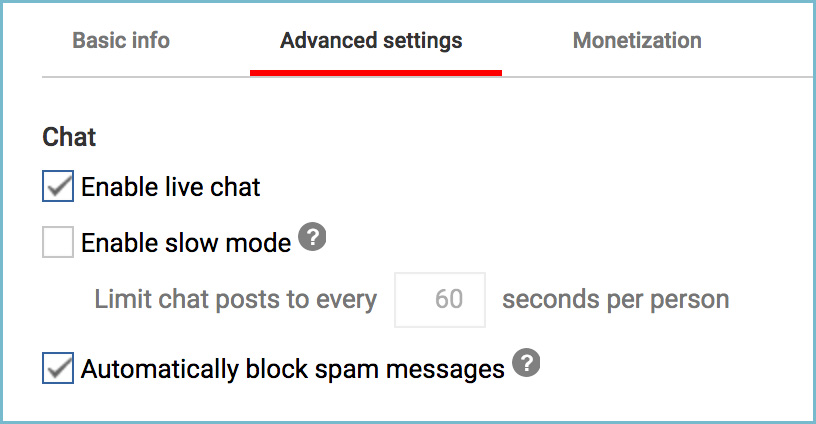
5. Under the “Advanced settings,” ensure that “Enable live chat” is checked under the Chat column.
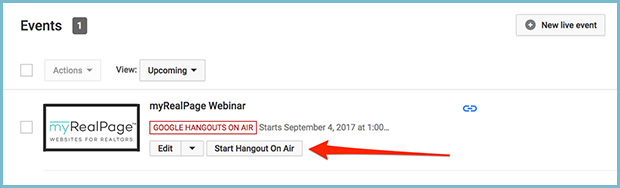
6. Once your event is created, you’ll then see it scheduled under your “Events” in the left-hand menu.
7. At the time of your scheduled webinar, you’ll click “Start Hangout On Air” to officially go live.
P.S. It is safe to hit that button before your scheduled webinar, and you’re encouraged to do so to check that all your video and audio components are in working order.
Here’s what it looks like once you click “Start Hangout On Air”:
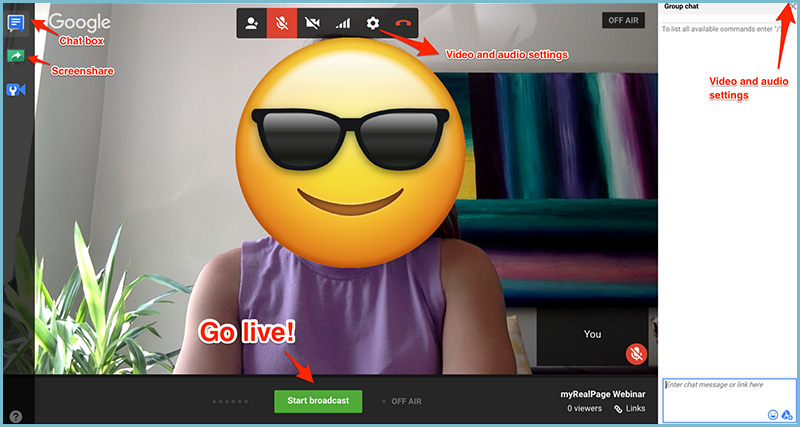
What you’ll be able to see *before* you go live are functions like the chat box, the screen share, your video and audio setup, and the big green “Start broadcast” button. Once you hit that button, you’ll officially be on air and live.
And that’s it!
That’s all it takes to set yourself up to host a free real estate webinar.
If you’re feeling unsure about the tech and setup, it’s a great idea to set up an unlisted event as a practice – just so you can get a feel for what it’s like to go live, and test out how to share your screen (assuming you’ll be presenting a slideshow to your audience).
Here’s how:
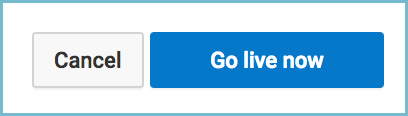
Create another test event (you can choose to schedule it in advance or choose the “Go live now” button once you’ve created it), and be sure to choose the “Unlisted” option – as you do NOT want this one going public.
In your test, be sure to check out all the buttons and features of the live broadcast room so that you’re uber comfortable for when the real deal happens.
Now that the tech for your webinar is set up, all that’s left to do is prep to go live!
Will you be hosting a live webinar using YouTube? Let us know how it goes!