Feature Spotlight: Integrated Social Media Tools (with How-To Guide)
Nowadays, more and more businesses are finding it crucial to have a solid online marketing strategy. One of the biggest facets of such strategies is social media, as its reach and efficiency has been proven time and time again. myRealPage understands the importance of social media-readiness, which is why every MRP website comes with built-in social media tools that aim to help every realtor with establishing their online presence.
For easy sharing on various social media platforms, there are three main places on every myRealPage website where you can easily add share buttons. Here’s what those are, and how to use them.
Home page and main site template
You can easily add links to your social media channels on your myRealPage website. These links will appear on either the header, the footer, or both the header and footer of your website, depending on the site template you are using.
These links also appear no matter which page of your website a visitor navigates to. This ensures that they will be able to easily find you, and reach out to you on your chosen social media platform.
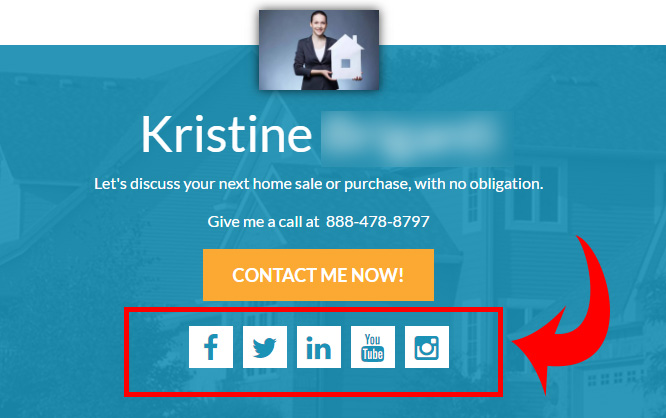
Social media links on your myRealPage home page, header, and/or footer
To do this, simply log in to your Private Office account, and under the “Website” tab, click “Social Media.” You can then start adding the relevant links.
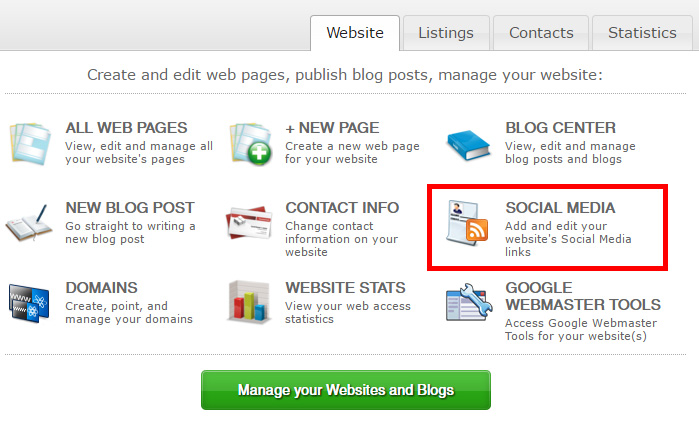
Social Media link under Websites tab in Private Office
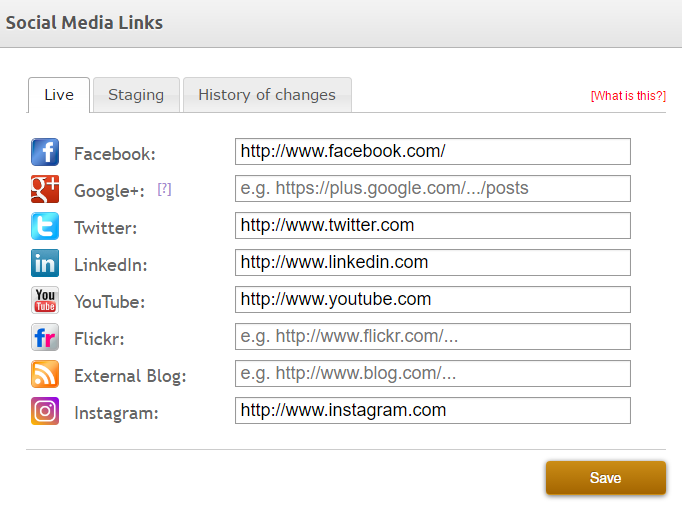
Add links to your social media accounts
By filling in these details, links to your social media accounts are also automatically added to your Contact Page, as seen below.
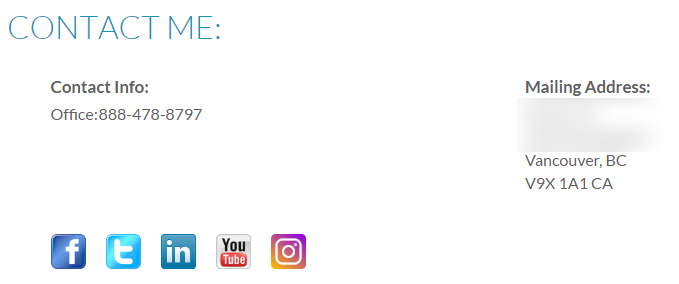
Your social media links also appear in your contact page
Listings
Being able to share your listings is, of course, very important! So make sure this feature is turned on for your website. You can do this by going to your “Listings” tab in Private Office, and going to the “Options and Settings” section. From there, click on “Show/Hide Options,” and make sure that the social sharing option is set to “Yes.”
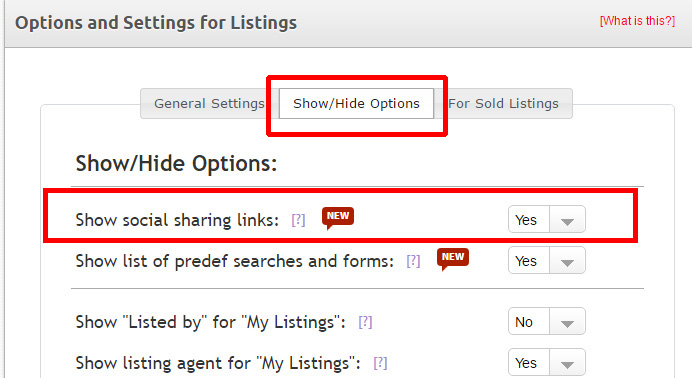
How to turn on the social sharing function for your listings
After selecting this and publishing your changes, options to share your listing on sites such as Facebook and Twitter should now be available.
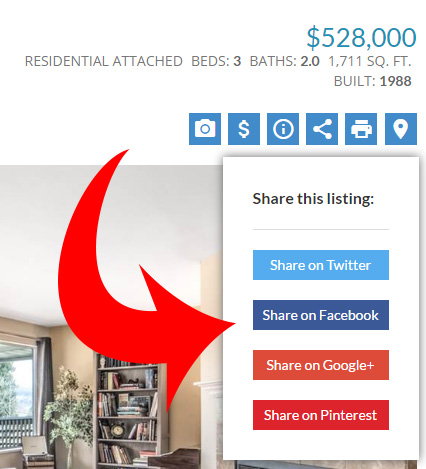
Social media sharing buttons on each listing
Blogs
You’ve taken the time to write and publish some nice blog posts, with original, thoughtful content, so it just makes sense to make sure that everybody gets to see it! Promote your blog posts on social media, and make sure that it’s easy to share.
Activate this feature for your myRealPage site’s Blog section by going to the “Website” tab in Private Office, clicking on “All Web Pages,” and opening the Page Editor for your blog.
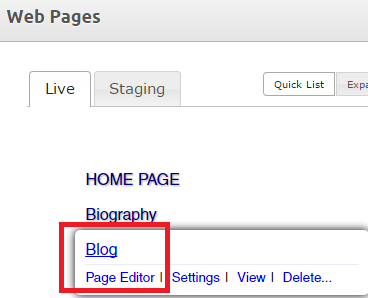
Open the page editor for your MRP blog
Once the Page Editor is open, click the green “Edit This” weblet button, and a pop-up will appear. Click on the “Social” tab, and set all the dropdowns to “Yes.”

Click on the Edit This weblet
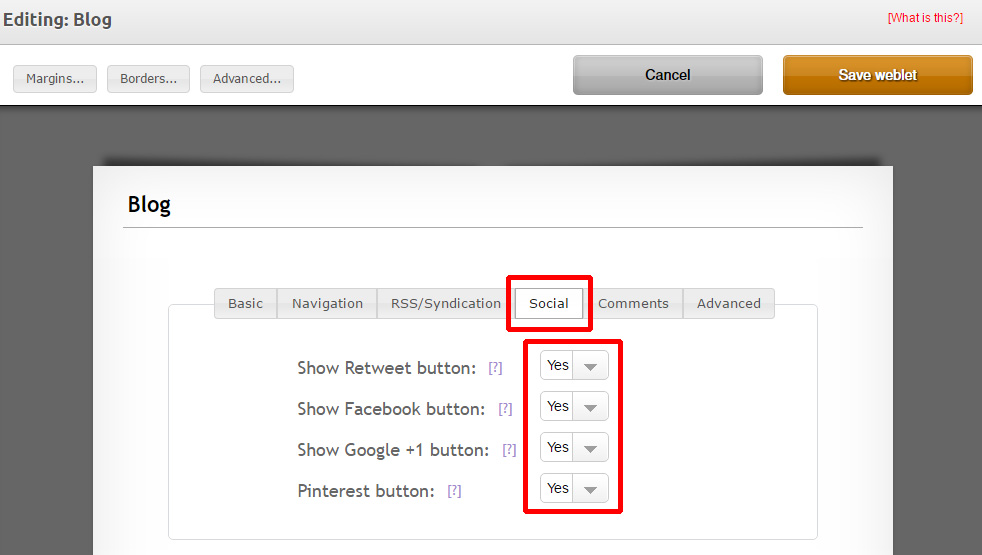
Navigate to the social tab, and select Yes
Once you’ve saved your work, check your myRealPage blog. Each blog post should now have social media sharing options available!
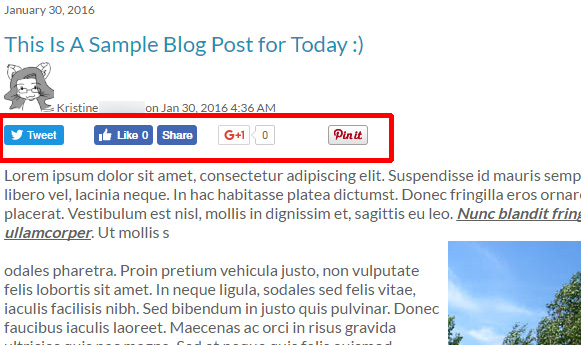
Social media share buttons on your blog posts
This post is part of a series of articles that highlight various myRealPage products and features. A new post within this series will be available each month. The Feature Spotlight Series introduces visitors to myRealPage’s numerous tools and features. It also aims to help current clients with making the most out of their myRealPage websites.
Last Updated on August 12, 2022 by myRealPage