Vlogging for REALTORS®: How to Vlog and Boost Your Real Estate Business
So you’re creating video content for your real estate business. Awesome!
(If you’re not, consult this list of reasons why REALTORS® need video content).
But are you… vlogging?
vlog
noun \ ˈvlȯg , ˈvläg \
Definition of vlog
a blog that contains video material
Vlog = video + blog.
As per Merriam-Webster’s definition, a vlog is like a blog post, but in video form. Vlogs are different than other video content, where the video maker might never actually appear or speak on camera. Vlogs have more personality and typically feature the video maker, front and centre.
In a real estate context, an example of a vlog would be a video where a real estate agent is sharing their top 10 tips for prepping a home for listing. The agent would appear on camera, talking to viewers. This is different than say, a listing video, which might only feature footage of a home, set to music and with text overlays.
Perhaps you’re camera-shy and have avoided creating vlog content.
Or maybe you’re not sure what you’d talk about.
Vlog content can be a powerful marketing tool for real estate agents because…
- It personalizes you. Vlogs give you an opportunity to show off your personality and build your personal brand — the next best thing to meeting potential clients in person.
- It repurposes your blog content. Already writing blog content? Turn them into vlogs and give your content a second life!
- It can boost your reach and engagement on social media. Social media algorithms and users love video content. Vlogs = a wealth of video content to share.
Today we’re diving into vlogging tips and tricks for real estate agents — what you need to know to produce engaging real estate vlogs that can boost your real estate business.
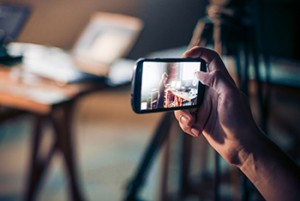
1. Set Yourself Up With the Right Equipment
You don’t necessarily need any *special* equipment to vlog. If you’re already creating video content for your real estate business, you probably already have everything you need.
Here’s a rundown.
A camera. If you have a fancy digital camera, great! Otherwise, your smartphone — providing it’s no older than a 2015 model — will suffice. Newer phone models are equipped with excellent cameras that produce high-quality videos. While it is true that the cost of a camera for vlogging can be quite expensive, it is still a good idea to purchase one that does not require too much to use and to keep it working.
A microphone. A proper, external microphone will ensure that the audio quality of your video is crisp and clear. As we recommended in our guide to creating your own home video studio, lav microphone kits are popular for its excellent value.
A tripod. Your video footage should be properly framed, focused and level. You could place your camera or phone on a stack of books, or ask a friend to film for you, but neither will do as good a job as a tripod. There’s a wide variety of tripods available at a wide variety of prices. Whichever you choose, make sure it can extend to stand at full height so you have options when it comes to how you frame your shot.
A “studio.” You don’t need to build a dedicated studio for filming, or rent one each time you film. Just choose the right setting in your own home or office. The room should be well lit; natural lighting is best but lamps angled towards you (outside of the frame) can help out.
A very important lighting tip to remember is to face your light source!
Remove clutter, noisy art or patterns, and highly reflective materials. Consider a place that adds some personality, such as your home office. You don’t have to stick to the same spot each time you film, but make sure each location adheres to the above principles.
Editing software. For a video that’s engaging from start to finish, you’re going to need to edit your footage. If you’re a Mac user, you’ve already got iMovie, which offers everything you’ll need to produce a pro-looking vlog. Otherwise, check out HitFilm Express or Lightworks, or the Adobe Premiere Clip or FilmoraGo apps for editing from your phone.
2. Choose Engaging Topics
Coming up with ideas is the hardest part. Generally speaking, the best vlog topics are topics that…
- You feel confident speaking about
- You can talk with personality about
- You can offer unique insight on
So, a vlog about how to use the MLS system? Not very interesting.
A vlog about your top expert tips for adding curb appeal? Interesting!
We’ve got a bunch of other worthy vlog topics for you to consider:
- 10 Things I Tell Every Client Before They List
- The Buying and Selling Secrets Real Estate Agents Don’t Want You to Know
- [City Name]’s Hottest Neighbourhoods in 2018
- Insider Tips for Winning a Bidding War
- The $500 Home Makeover That Can Boost Your Home’s Value By $5,000
- How House Hunters Can Get the Most Out of an Open House
- 10 Questions You Should Ask Your Potential REALTOR®
- What My Stager Says Every Seller Needs to Do
- What My Home Inspector Says Buyers Need to Pay Close Attention To
- My Predictions for the 2019 Real Estate Market
- The Best Options for First-Time Homebuyers in 2018
3. Create a Script
Vlogs are casual and personable; they shouldn’t feel rehearsed or formal. But that doesn’t mean you should go off-the-cuff when filming. Complete spontaneity can lead to a disorganized, disengaging mess that even good editing can’t fix.
Prepare for each vlog by outlining what you want to discuss and in what order. Then, write out a few notes for each talking point or even a complete script.
Remember to inject some personality; your vlog should look, feel and sound like you, and help strengthen your personal brand. Check out how celebrity real estate agent Tatiana Londono adds her own spin in this video.
You don’t have to stick to your script word-for-word when filming, but preparing will help you feel confident with the subject matter. Practice with the script so you can identify any weak or ineffective elements.
Your vlog should ideally include more than just your talking head. In your outline, identify where you might want to add photos, video clips, text overlays or charts during the editing process.
4. Edit Like a Pro
Editing is where your video comes to life.
Using software like the options mentioned earlier in this post, you’re going to want to trim your footage, add transitions, insert images and text overlays and perhaps adjust the brightness and volume levels.
How you edit is up to you. Editing style is another way you can personalize your content; you could, for instance, use lots of quick cuts to make the video feel fast-paced and high-energy, or you might use text overlays to add emphasis, make a joke or provide additional information.
No matter your editing style, there are a few standard things you should keep in mind:
- Length. How often do you watch eight-minute-long YouTube videos? Probably never. Don’t expect your viewers to be any different. Three minutes is a good duration to aim for.
- Audio. It should be crisp and clear. Use music only when necessary, like during images or video clips. Stay away from too many sound effects, distracting music or layering audio tracks.
- Quality. Make sure that every video clip and image you use is high-resolution. Fuzzy footage and photos make you look unprofessional.
- Effects. Sure, editing software comes with lots of fancy options, like decorative borders, dizzying transitions and funny sound effects. That doesn’t mean you should use all of them. Or any of them. Keep effects to a minimum.
Are you vlogging? What’s been your most popular video? Share a link in the comments!
Last Updated on July 12, 2024 by myRealPage